

Paternity Tests
Paternity Tests
Paternity Tests
Paternity Tests
Paternity Tests
Paternity Tests
Relationship Tests
Relationship Tests
Relationship Tests
Relationship Tests
Relationship Tests
Relationship Tests
Ancestry Tests
Ancestry Tests
Ancestry Tests
Ancestry Tests
Other Tests
Other Tests
Other Tests
Other Tests
Other Tests
Other Tests
Health Tests
Health Tests
Health Tests
Health Tests
Health Tests
Health Tests
Health Tests
Health Tests
Health Tests
Health Test
Health Tests
Clinical Tests
Clinical Tests
Clinical Tests
Clinical Tests
Clinical Tests
Dog DNA Tests
Dog DNA Tests
Dog DNA Tests
Dog DNA Tests
Dog DNA Tests
Dog DNA Tests
Dog DNA Tests
Dog DNA Tests
Dog DNA Tests
Dog DNA Tests
Dog DNA Tests
Dog DNA Tests
Cat DNA Tests
Cat DNA Tests
Cat DNA Tests
Cat DNA Tests
Cat DNA Tests
Cat DNA Tests
Horse DNA Tests
Horse DNA Tests
Horse DNA Tests
Horse DNA Tests
Horse DNA Tests
Horse DNA Tests
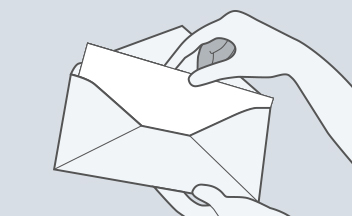
Upon placing your order with EasyDNA, we will ship your DNA testing kit to the supplied address. Then, sample collection is simple and straightforward. All of our home DNA sample kits are packaged discreetly, with no company or content labels, meaning everything is kept anonymous!
Once you place your order with EasyDNA, a DNA testing kit is dispatched to the supplied address. All home DNA sample collection kits are sent in discreet packaging that have no company or content labels, meaning that you can rest easy knowing that you may get your test done in total anonymity.
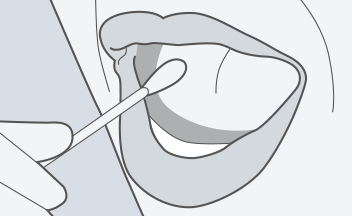
There is no collection of blood or painful needles. A simple sample collection of your saliva using our oral swabs is all we need to carry out DNA analysis in the laboratories.
Use this sample collection guide to familiarize yourself with the DNA sample collection process from start to finish. Knowing this information will facilitate things for you when your kit arrives in the mail.
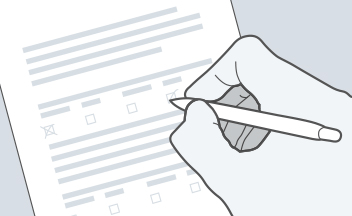
Note: Everyone participating in the DNA test should carefully read these instructions prior to providing their sample. Refrain from eating or drinking anything for at least on half hour prior to collecting the saliva samples. Traces of food or beverages present in the mouth at the time of the sample collection may contaminate DNA samples. Do not touch the swabs to check whether they are dry and make sure to place the swabs into their corresponding sample collection envelopes please be sure to label the envelopes.
Our DNA test kit contains oral swabs (also called “buccal swabs”). Watch our brief sample collection video to learn how to collect your samples or read the more detailed step by step instructions below.
If for any reason your do not wish to wait for EasyDNA to send you your sample collection kit, you have the option to make your own kit at home. The things needed to create a home kit are readily available and creating your own should not be too difficult following our instructions and guidelines. Learn more about how to make your own DNA sample collection kit yourself, visit this link.
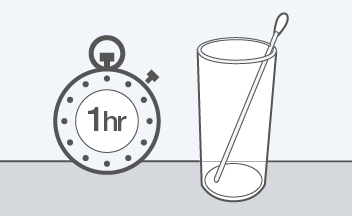
If using a glass to dry your oral swabs, be sure to use a separate glass for each person’s sample. Use a short glass to allow your sample to dry. Cotton part of the swab facing upwards, protruding out of the glass rim.
If consent forms are incomplete or shoddily filled in, we might have to put your testing on hold and ask you to re-send the forms correctly filled in. This will delay your test. Proceed to remove the swabs from their envelopes. Do not place your fingers on the cotton portion of the colored swabs as this could contaminate the DNA samples. Each envelope has two oral cotton swabs for every person: you are required to use BOTH.
We recommend using a glass and placing the oral swab upside down (cotton side up) inside it. Make sure that swabs from different test participants do not at any point come into contact.
Do not touch the swabs to check whether they are dry and make sure to place swabs back into the envelopes with their corresponding colour.
|
Uploaded
Failed
|
 |